***As a disclaimer, this isn’t a step-by-step-anyone-with-power-tools-can-do-this kind of project.***
We’ve had several questions and requests for more details of how we built our own cabinets. Ashley said, “You and Ben should do some sort of a write-up as to the materials you used and how you designed the cabinets, a breakdown of the costs, etc. I also have a small kitchen and am looking to redo it as well. We’d love to make custom cabinets, but I’m not sure how much we’d have to spend or even what materials to use! I know determining sizes would be unique to each kitchen, but if there’s any sort of snags you came across when measuring, things to look out for or remember, etc. those would be helpful to keep in mind. I think the construction is what I’m most curious about though because we could use our existing cabinets as a means of measurement.”
Those are all very good questions. And we have answers, hopefully they’re sufficient. Let’s start with the basics; the material and pricing. We used 3/4 inch cabinet grade plywood for nearly everything. The reason? Plywood is super sturdy and we would rather over build something than have problems down the road. Better safe than sorry. Cabinet grade is smoother with fewer knots than other plywood, so it costs a little more. At Montana Home Depots, a 4 foot by 8 foot sheet of plywood costs about $25. For all the cabinets, we’ve used 17 sheets.
For the drawer fronts we used MDF because it’s smoother and we don’t need plywood for strength. When we designed the cabinets, we pretty much kept the layout we already had with some modifications. If you’re keeping the same layout, you can measure the cabinets to make the new ones. Our overall sizes were nearly identical to the old cabinets, we just combined a few. One thing to take into consideration are the wasted spaces in your current layout. Sometimes there’s a reason for it, like in our corner cabinet.

When measuring, remember you need to allow for clearance of hardware and door swings. But if it ain’t broke, don’t fix it.
Another thing to consider when measuring is how deep your cabinets are. A piece of plywood is four feet wide, but you’ll want to make your cabinets just under two feet deep (ours are 23 3/4 inches deep) to maximize sheets of plywood. Remember, the saw blade eats up a sliver of the wood. Preventing waste will also help keep the cost down.
To keep things as simple and sturdy as possible, we make the toe kicks out of 2 by 4 studs. This way you’re not factoring the space into the cabinet, you’re simply building two boxes to set on the other.
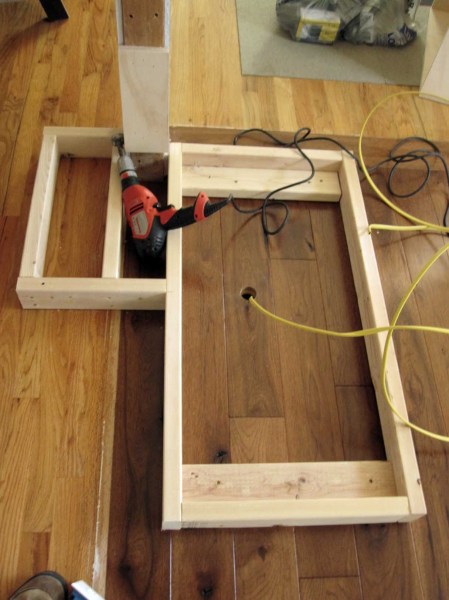
Now that we’ve covered the basics, how about we move on to the building phase? Ben builds cabinets with the top and bottom pieces the full width and depth of the overall size.

For example, the cabinets by our stove are 42 inches wide by 23 3/4 inches deep by 32 1/2 inches tall, not including the toe kick.

The top and bottom pieces of this cabinet measure 42 inches by 23 3/4 inches. Because the top and bottom are the full size, the sides and back rest inside. So the sides of this cabinet are 23 3/4 inches deep by 31 inches tall. The back is the smallest at 31 inches tall by 40 1/2 inches wide.

To hold everything securely, Ben applies a bead of wood glue, then nails everything together using 16 guage nails in an air nailer.


The process is similar for building the drawers, too. The bottom piece is the entire width and depth. Attach the sides next, which extend front to back with the height you prefer. Each drawer will vary in height. Finally, the back and front fit between the side pieces. Everything is glued and nailed into place and allowed to dry.

With the cabinets installed, Ben added another thin strip of 3/4 inch plywood to attach the face framing to. For our visible end panels, we covered the rougher plywood with smooth 1/2 inch thick MDF. For added decorative detail, 1/4 inch thick by 2 1/2 inch wide MDF borders the edges.

Using plywood for the drawer sides does come with a complication; hiding the top edge. You could use iron on veneer but we opted to fill the cracks with wood filler to sand everything smooth to prepare for primer and paint.

The plywood edges of the cabinets all get a face lift in the form of 1/4 inch MDF. We decided on a mix of traditional and European style drawers.
Traditional style cabinets have a divider strip between each cabinet and drawer, like these from Young House Love:

European style cabinet doors and drawer fronts nearly touch one another, like these:

Our mix has a 3/4 inch reveal {the width of visible cabinet face} on all outside edges, but the drawers nearly touch each other.

After deciding on the reveal width, Ben started building drawer fronts. Ours are a simple shaker style; a flat panel with a thin border detail. To make the drawer faces, Ben cut pieces of 1/2 inch MDF to the overall size for each drawer. Then he cut tons of 2 1/2 inch wide 1/4 inch thick strips of MDF. Using a pin nailer and glue, Ben added the trim detail.

And now, for the super tedious part; filling, sanding, priming, and painting the cabinets for a seamless, polished look. We like to use Elmer’s Wood Filler and a small putty knife to get in the small cracks. For nail holes, I like to use my finger to squish the filler in the hole. Let the filler dry overnight, then sand with a high grit (about 220) sand paper.

If necessary, fill areas and sand again. Run your fingers over the surface. If you feel a bump, keep on sanding. The true test is after the coat of primer. If you see a crack or hole once the primer has dried, don’t hold out hope the paint will fill it. It won’t and you’ll be more annoyed about touching it up. And, if you’re like I am, you probably will never do it.
When it’s time to install the drawer fronts, first measure, mark, and drill holes for your hardware. To save time (and aggravation), I make a paper template. I measure the distance between the hardware holes and poke holes to easily mark the cabinets. You could buy a template at the hardware store, too. These holes will come in handy when trying to attach the fronts. Use spacers to make sure they’re lined up, then screw through the pre-drilled hardware holes, going into the actual drawer.

This will hold the front in place while you screw from the inside to secure the front. Back out the screws, drill through the drawer, and add your hardware.
Finish off the 2 by 4 toe kick with a piece of primed and painted 1/4 inch thick MDF. If you use caulking, glue, or pin nails, you’ll have minimal touch up paint.

So that’s how we made our lower drawers, but we’ve still got the upper cabinets to discuss.
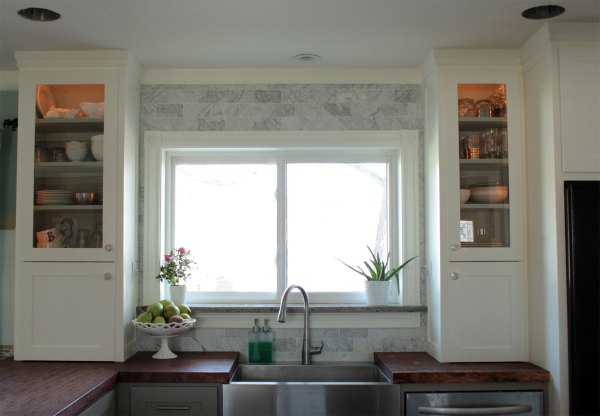
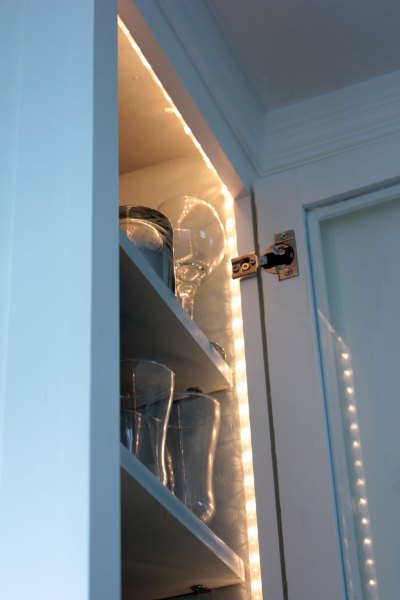
Upper cabinets begin in much the same way as the lower drawers. Make a plywood box to size, but you don’t have to build drawer boxes to go inside. Easy, right? Hang the cabinet box, screwing into studs. Here’s where the building is different. Rather than 1/4 inch MDF facing, you’ll need 3/4 inch thick wood facing. We used poplar because it’s easy to work with and durable with minimal grain. Add any decorative side trim first, subtracting the thickness of the poplar to keep an even border. Nail the poplar trim (ours is 1 1/2 inches wide) to the front edges, keeping the sides flush. Fill every hole and crack (dirty!), sand smooth, prime, and paint.
If you want solid doors, follow the same steps as the drawer fronts. But, for glass front doors, you’ve got a little more work ahead of you. Using real wood, we used poplar but Ben would use oak if he had to do this again, cut 2 1/2 inch wide strips. Using a router, make a tongue and groove system for the frame pieces to fit together. Remember, this only has to be 2 1/2 inches from the long ends. Then, apply a bead of glue and slide the pieces together. Use pin nails to keep the frames from shifting before drying. After the glue sets, router out a channel for the glass.

The router can’t get the corners completely square, so use a utility knife and chisel to square everything up.

We took our doors to a local glass shop where they cut and installed the glass for us.
To hang the doors, first use a Forstner drill bit to recess the hidden hinge.

Attach the hinge to the cabinet door. Get a helper to hold the cabinet door while marking, drilling pilot holes, and screwing the hinges to the cabinet frame.

Then get a beer, wine, margarita, or a Coke and enjoy your new cabinets, relishing how much money you saved by building your own cabinets. Speaking of how much you’ll save, let’s look at our pricing.
DIY Cabinet Building Budget Break Down:
17 Sheets of Cabinet Plywood: $249.85 {Ben got a really good deal on the plywood, though I don’t remember how…}
2 Sheets of 3/4 MDF: $69.00 {mostly used for cabinet shelving}
7 Sheets of 1/2 MDF: $171.50 {for drawer fronts and end panels}
2 Sheets of 1/4 MDF: $28.00 {for drawer front banding and face frames}
4 gallons of gray Glidden paint: $57.08 {originally $87.88 because Wal-Mart didn’t have their brand in stock; used to paint the insides of the cabinets and drawers-we only used 2 1/2 gallons}
10 2×6 studs (used to support the wall we tore down) and 10 2×4 studs (used for toe kicks): $80.00 {Still grouped together because I don’t know individual costs of the studs}
Drawer Glides: $56.16
Behr white paint, for upper cabinets: $32.98
Glidden White Paint, for trim: $24.97
Vinyl bumper pads: $7.74 {for three packs}
Bolts and screws for drawer fronts and handles: $14.78
Cabinet door hinges: $34.72 for 16
Poplar for cabinet frames: $27.00 for 18 board feet
Drawer Pulls: $63.00 {or $31.50 for 10 at Lowe’s}
Door Knobs: $20.00 for 8
2 packages of Shelf Supports: $9.98
Glass for Doors: $30.60
We already had all the tools as well as wood filler, sand paper, nails, etc.
Grand total for cabinet supplies: $972.67
Price for KraftMaid cabinets: $7,000-$9,000 {depending on the style and upgrades}
Total savings for DIYing the cabinets: $6,027.33-$8,027.33
Things to remember:
This might seem blindingly obvious and unnecessary to mention, but you are deciding every. single. detail. Unlike buying cabinets, you have a lot to think about and decide. Where will your toe kicks go; only on the fronts? How big/deep should the drawers be? What will the visible end panels look like? Traditional or European style?
Measure, measure, measure! That old rule ‘measure twice, cut once’ most definitely applies to cabinet building. Make sure to take the plywood width into consideration when determining cabinet sizes, too.
It helps to have all supplies before building starts. Get your drawer glides so you know how big to build your drawers.
If you like your cabinet layout and the existing cabinet frames are in good condition, building new cabinet doors and drawer fronts might be an affordable way for you to update your kitchen. Because you’ve got pre-determined sizes, building might be easier.
We have absolutely no regrets going with all drawer lowers. They’re much more functional and we’ve picked up a lot of space, even in the same footprint.
Now, if you still have questions, lay them on me.


